Oat Bran is great for your heart! It lowers your bad (LDL) cholesterol and raises your good (HDL) cholesterol. Just because something is good for you doesn't mean it has to taste awful or bland. Since Rob's trips to the hospital (angioplasty) we have really tried to incorporate good tasting, heart foods into our diets more than before!
Max made these beautiful Banana Oat Bran Muffins this morning. They're easy, quick and very tasty!! (They passed the Tommi taste test already!)
Ingredients:
2 1/4 cups oat bran
1 Tbsn baking powder
1/4 cup brown sugar
1 1/4 cups milk
2 very ripe bananas, mashed
2 egg whites
2 Tbsn vegetable oil
1/4 cup chopped walnuts (optional - we leave em out)
Preheat oven to 425 degrees. Mix all ingredients together. Pour out into muffin pans (preferably lined with muffin papers).
Bake for 17 minutes. Yes, only 17 minutes... that's not a typo. Take em out, let em cool and eat em up! YUM!
Sunday, January 24, 2010
Heart Smart Banana Oat Bran Muffins
Posted by TeachezVous at 11:44 AM 0 comments
Saturday, January 23, 2010
Candle Making
Start saving your candle ends, everyone! Why waste those little candle nubs especially when they can be used to make brand new candles? People spend a fortune on fancy candles, but will throw away the end that won't burn anymore because the candle got so low.
I'll show you how to use your old candles to make new ones and we'll use things that are around the house for molds. I'll put a list up of things you will need just before I roll out the instructions!
Posted by TeachezVous at 2:02 PM 0 comments
Friday, January 22, 2010
Taking the Fear out of Risotto (Shitake-Parmesan Risotto)
Are you intimidated by risotto? You see all those fancy chefs making it, you hear about it in fancy restaurants that I can't afford to eat in, it's ALWAYS on those cooking shows as a staple of haute cuisine. I'm here to say: There's nothing to be afraid of!!!!! It's easy. Scouts honor!
A little hint first: if you see a recipe for risotto that calls for shallots never fear. Just use an onion. Shallots are just fancy little tiny purplish onions. Use the same amount of onion!
Basic Ingredients:
1 cup of arborio rice
2 Tbsn olive oil
2 Tbsn butter
1/2 cup chopped onion
3 cups stock (you can use vegetable or chicken stock. You can mix either with water like 1 1/2 cups stock and 1 1/2 cups water)
Extra Ingredients: (and you can experiment once you learn the basics)
3 Shitake mushrooms, chopped(I used dehydrated, reconstituted in water and use the soaking water with the broth for cooking)
1 Tbsn white wine
2 Tbsn grated Parmesan
Directions:
Saute onions and mushrooms in the olive oil and butter for 5 minutes. Add rice, stir it around to get it coated with the oils and onions for 2 minutes, add 1 cup of liquid. Cook, stirring constantly, until the liquid has been absorbed (rice will start to look creamy). Add another cup of liquid, stirring constantly until absorbed again. Add last cup of liquid, 1 Tbsn of wine, and cook, stirring constantly, until the liquid is fully absorbed. Remove from heat.
Add Parmesan cheese, stir it up, and set it to the side, covered, for 5 minutes. Salt and pepper to taste. Now serve and enjoy!!
Wow! That seemed WAY too easy didn't it?? What the heck were we so afraid of??
Posted by TeachezVous at 11:36 AM 0 comments
Rebatch Soap Making (Basil & Chamomile)
Welcome......
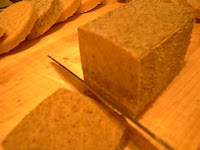
Here's the soap all cut just before I shred it.
I wanted to put a small note in regarding the soap: If you cannot buy soap like i do, you can take unscented beauty bars, grate them up and do everything the same! It works.. I've tried! You just get to add your own goodies!
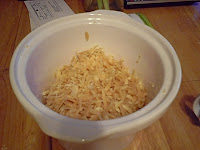
Here's the shredded soap
Put 6 loosely packed cups of shredded soap into the crock pot.
Now we're going to add 1/2 cup of liquid milk (no, you won't gain weight if you use whole milk, but please do not use soy milk!)
Set crock pot on High setting, cover and leave for 1/2 hour.
After a 1/2 hour use your soap spoon and stir carefully from the bottom. The soap on stop will still be unmelted, but the soap on the bottom will have begun to melt. Stir to get more of the unmelted soap towards the bottom.
Cover and check back every 15 minutes until soap has completely melted.
At this time add 1/2 cup of dry (or powdered) milk. Mix carefully at first because that powder just loves to fly everywhere! (You'll probably want to be careful handling the crock pot as it will be hot!) You'll see the milk powder start to melt into the soap and it will give the soap a lighter, creamier appearance. Stir thoroughly to incorporate the milk powder throughout the soap. You don't really want thick ribbons of dark soap with the lighter ribbons. While it sounds like that would be a pretty design it defeats the purpose of the moisturizing, nourishing (binding) milk powder!
Once you have the milk powder fully blended in. Put the top back on and get your work station prepared for adding the remaining ingredients and pouring it into the molds (get potholders for that part!)
Now that you're ready to finish this part of the project, turn off the crock pot. Stir the soap thoroughly as you may have had a little more separation.
Add 20 drops of your essential oil(s) to 2 tsp of your regular oil (almond, olive, grapeseed, jojoba, apricot kernel, etc). Mix it together (by the way.. if you keep extra chopsticks from take out.. this is a great way to use them!). If you feel you need more essential oils then you can add more. It's a good thing to remember that you get used to smell when you're surrounded by it. (I learned that lesson with patchouli - whoa)
Add the oil mixture to your soap and stir until it's all mixed in evenly. Now, if you'd like an exfoliate, you can add it. I'm not adding any here, but if I were I'd add about 1/4 to 1/2 a cup depending on the type I was using. The finer the grain the less you use.
Now that everything is all mixed up nice it's time to pour it all into your milk carton mold. Take the pot and pour all ingredients into the milk carton until it's full to the top (right where the top line before the spout part).
You're done! Now it's time for the hardest part. Set it somewhere out of the way and leave it alone. I set the carton on a tray in a closet.
Tomorrow I'll do the unveiling, unmolding, cutting and curing part!
DAY 2 - UNMOLDING, CUTTING AND CURING!
Today I took the molds out, ripped them cartons away and cut the soap. The soap is very soft and you have to be careful with it so that you don't dent the sides. If you do.. no biggie.. It's still going to be soap and you'll get better at it as you go!
Both turned out beautifully! The lighter one is the basil and the darker one is the chamomile.
I then lay out the pieces out on wire racks. I found stackable wire racks at Target for next to nothing. I got 3 of them and they've never let me down! Try not to let the soap touch and only do single layers.
Now put the soap somewhere that it can sit for 4-6 weeks to cure. Curing is the drying process that makes soap hard and last longer. If you were to use the soap now it would just disintegrate. After 4-6 weeks you can put the soap in a basket or store it like you would normal soap... and ENJOY!
Posted by TeachezVous at 10:40 AM 0 comments
Labels: Soap Making - Rebatch
Thursday, January 21, 2010
ReNew, ReUse, ReCycle
So a few little tips for ways to save money, but so that you can also be resource savvy!
I use the following websites:
www.paperbackswap.com
www.swapadvd.com
www.swapacd.com
Want to get rid of old stuff laying around and get something you want or will use for next to nothing? Check these out!
Let's also remember to give praise to the Tightwad Gazette! If you need to learn to budget, save on food shopping or anything else when it comes to running a household.. then check these books out! If you have questions about them, just let me know!
A big THANKS to my fellow minimalist, Stephanie, for the Swap sites! It's great to have less stuff holding you down, but also to be able to get new(er) stuff for next to nothing!
Posted by TeachezVous at 3:37 PM 0 comments
Bread Tutorial
Ingredients:
2 1/4 teaspoons (1 packet) active dry yeast
1 teaspoon sugar
1 1/2 cups warm water (wrist warm like baby milk)
3 1/2 cups flour (you can use bread flour or regular)
2 teaspoons salt
Combine yeast and water in a bowl (I used my biggest Pyrex bowl) Yeast! You can buy this in packets or a jar. I found that using the packets is kinda nice! Add 1 teaspoon of sugar and whisk until yeast and sugar dissolve. Allow to sit for 2 minutes.
Uncover and add 1 3/4 cups flour. (Notice the bubbles) Use rubber spatula to incorporate flour until it can be turned out onto work surface.
Turn sloppy goopy dough out onto well floured work surface.
If you want to add any herbs.. now's the time. It's all up to your preference. Rosemary.. mmmm. Garlic.. nom nom. Mix a bunch of em together!
Knead for 8-10 minutes (add flour whenever dough feels sticky) until dough can be formed into a pretty ball like this!
Spray your clean bowl with non-stick pan spray. You can also oil with oil & a paper towel (like doing a cake pan)
Put into bowl "pretty side" down. Flip it over right away!
Cover with same piece of plastic wrap and put in a warm, draft-free area for 1 1/2 - 2 hours.
Dough has risen more than double its size
Punch it.. then pull it over on itself twice.
Split dough into the pieces you want to use... I'm doing bread bowls so I have 5 pieces. For french loaves, cut in two even pieces.
For rounds.. roll out into circles.
For french loaves... roll into rectangles.
For rounds fold into the center.
For french loaves... roll into long loaves .. like a pretend jelly roll)
Pinch the folds
Cover with plastic wrap (yep.. same one.. don't be wasteful) and then put a towel over it. Allow to rise in warm, draft-free place for 1 1/2 hours.
Using a sharp knife or razor blade (be careful), score the bread... Xs for rounds or 4 diagonal slashes for loaves.
In the last 1/2 hour.. preheat the oven to 450 degrees!
Brush bread with melted butter (we use margarine from TJs) and this is where I add a little after-flavor. I put some Adobo into the melted margarine for a light flavor. Brush the bread being careful not to get it too drippy. It will make the oven smoke. Reserve the rest of your melty stuff for later! :)
Bake at 450 degrees for 10 minutes. Then lower and bake for another 25-35 minutes at 375 degrees.. until golden and lovely.
If you are a bread lover you'll know if you're set by the sound the crust makes when you knock on it. If your new at this... it'll sound kind of hollow and the bread won't mush in when you touch it.
Posted by TeachezVous at 3:11 PM 0 comments


