Welcome......
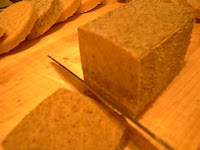
Here's the soap all cut just before I shred it.
I wanted to put a small note in regarding the soap: If you cannot buy soap like i do, you can take unscented beauty bars, grate them up and do everything the same! It works.. I've tried! You just get to add your own goodies!
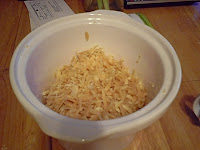
Here's the shredded soap
Put 6 loosely packed cups of shredded soap into the crock pot.
Now we're going to add 1/2 cup of liquid milk (no, you won't gain weight if you use whole milk, but please do not use soy milk!)
Set crock pot on High setting, cover and leave for 1/2 hour.
After a 1/2 hour use your soap spoon and stir carefully from the bottom. The soap on stop will still be unmelted, but the soap on the bottom will have begun to melt. Stir to get more of the unmelted soap towards the bottom.
Cover and check back every 15 minutes until soap has completely melted.
At this time add 1/2 cup of dry (or powdered) milk. Mix carefully at first because that powder just loves to fly everywhere! (You'll probably want to be careful handling the crock pot as it will be hot!) You'll see the milk powder start to melt into the soap and it will give the soap a lighter, creamier appearance. Stir thoroughly to incorporate the milk powder throughout the soap. You don't really want thick ribbons of dark soap with the lighter ribbons. While it sounds like that would be a pretty design it defeats the purpose of the moisturizing, nourishing (binding) milk powder!
Once you have the milk powder fully blended in. Put the top back on and get your work station prepared for adding the remaining ingredients and pouring it into the molds (get potholders for that part!)
Now that you're ready to finish this part of the project, turn off the crock pot. Stir the soap thoroughly as you may have had a little more separation.
Add 20 drops of your essential oil(s) to 2 tsp of your regular oil (almond, olive, grapeseed, jojoba, apricot kernel, etc). Mix it together (by the way.. if you keep extra chopsticks from take out.. this is a great way to use them!). If you feel you need more essential oils then you can add more. It's a good thing to remember that you get used to smell when you're surrounded by it. (I learned that lesson with patchouli - whoa)
Add the oil mixture to your soap and stir until it's all mixed in evenly. Now, if you'd like an exfoliate, you can add it. I'm not adding any here, but if I were I'd add about 1/4 to 1/2 a cup depending on the type I was using. The finer the grain the less you use.
Now that everything is all mixed up nice it's time to pour it all into your milk carton mold. Take the pot and pour all ingredients into the milk carton until it's full to the top (right where the top line before the spout part).
You're done! Now it's time for the hardest part. Set it somewhere out of the way and leave it alone. I set the carton on a tray in a closet.
Tomorrow I'll do the unveiling, unmolding, cutting and curing part!
DAY 2 - UNMOLDING, CUTTING AND CURING!
Today I took the molds out, ripped them cartons away and cut the soap. The soap is very soft and you have to be careful with it so that you don't dent the sides. If you do.. no biggie.. It's still going to be soap and you'll get better at it as you go!
Both turned out beautifully! The lighter one is the basil and the darker one is the chamomile.
I then lay out the pieces out on wire racks. I found stackable wire racks at Target for next to nothing. I got 3 of them and they've never let me down! Try not to let the soap touch and only do single layers.
Now put the soap somewhere that it can sit for 4-6 weeks to cure. Curing is the drying process that makes soap hard and last longer. If you were to use the soap now it would just disintegrate. After 4-6 weeks you can put the soap in a basket or store it like you would normal soap... and ENJOY!
Friday, January 22, 2010
Rebatch Soap Making (Basil & Chamomile)
Posted by TeachezVous at 10:40 AM
Labels: Soap Making - Rebatch
Subscribe to:
Post Comments (Atom)


0 comments:
Post a Comment